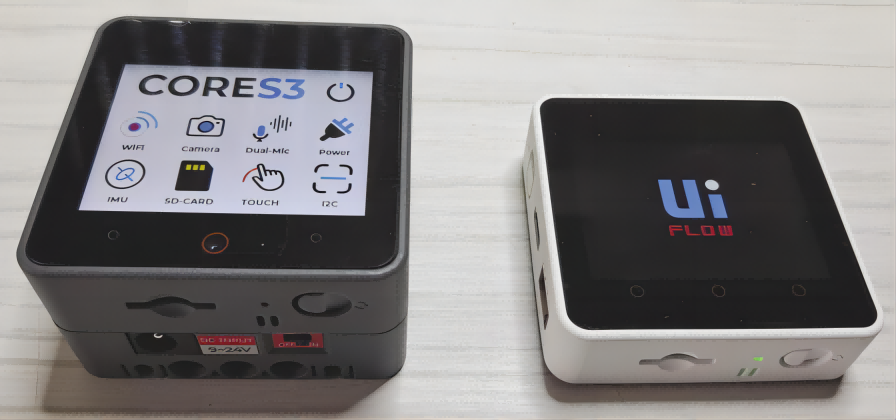
If you've ever needed to update firmware on an STM32-based device, you know the struggle—setting up an debugger, dealing with drivers, and ensuring proper connections. What if you could do it all without a dedicated programmer, using just your M5Stack Core2 or CoreS3? Enter M5 DAPLink, a powerful solution that transforms your M5 device into a standalone offline programmer.
Imagine being able to flash firmware anywhere, anytime—without needing a PC connection or extra hardware. Whether you're in the field, a classroom, or a factory line, M5 DAPLink makes firmware updates seamless. Just load your firmware onto a MicroSD card (for Core2) or a virtual USB drive (for CoreS3), and you're ready to go!
Required hardware:
• Core2 / CoreS3
• Module Bus
• MicroSD card
• Card reader
• Male-to-female Dupont wires
• Female-to-female Dupont wires
M5Burner
Download the M5Burner firmware flashing tool for your operating system from the links below. Extract and launch the application.
|
Software Version |
Download Link |
|
M5Burner_Windows |
|
|
M5Burner_MacOS |
|
|
M5Burner_Linux |
Open the burner tool, select the corresponding device type from the left menu, and download the matching firmware for your device.
CoreS3 DAPLink
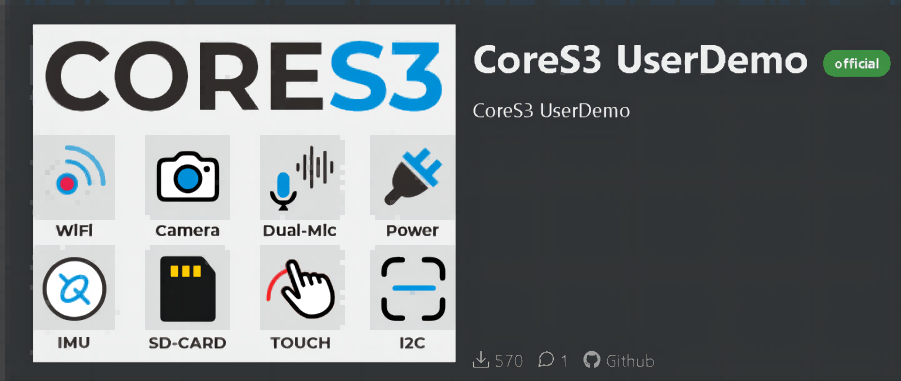
Download the firmware for CoreS3: CoreS3 → CoreS3 DAPLink. Refer to the CoreS3 documentation to learn how to enter download mode. Once the device is detected by your computer, proceed with flashing.


CoreS2 DAPLink
Download the firmware for Core2: Core2 → Core2 DAPLink. Refer to the Core2 documentation to install the required USB driver. Once the device is detected, proceed with flashing.


3. Importing Flashing Algorithms and Firmware
Download the algorithm package below. This package, along with the firmware, is imported into the host device and used to match different chip models during flashing. Some algorithms are preloaded in the firmware, while manual import allows for additional algorithm support. Import methods vary by device—refer to the details below.
• Virtual USB Drive Import
This method is currently only supported for CoreS3.
Extract the algorithm package and copy it to the CoreS3 virtual USB drive. Create a program folder in the root directory to store the firmware files (hex/bin) for flashing.


• MicroSD Import
This method is currently only supported for Core2.
Extract the algorithm package and copy it to the MicroSD card. Create a program folder in the root directory to store the firmware files (hex/bin). The directory structure is the same as the CoreS3 virtual USB method.
• Web Import
This method works for both Core2 and CoreS3. Imported data is automatically saved to the device's flash storage partition. (Note: For Core2 with an SD card, files are stored on the SD card. For CoreS3, safely eject the virtual USB drive before importing via the web.)
Power on the device to enable its AP hotspot. Connect your computer to the hotspot and visit 192.168.4.1 in a browser. Click Program to navigate to the file upload page, then upload the algorithm and firmware files.


4. Device Connection
The DAPLink pin mappings for the firmware are as follows:

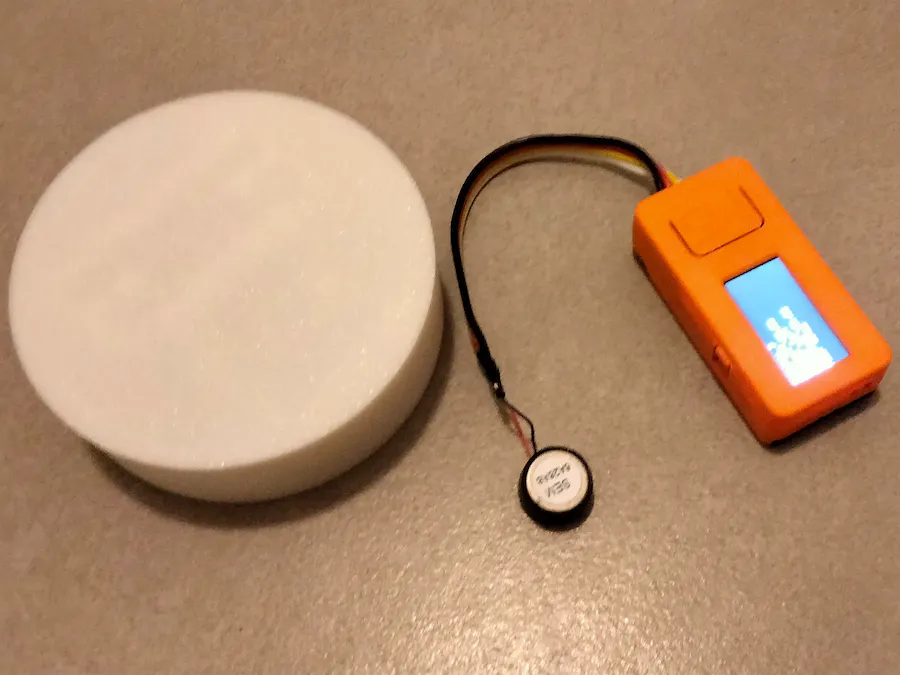
For example, to update the firmware of a Unit EXT.IO2, locate the programming pads after opening the device casing and connect them according to the pin mapping above. If contact is unstable, tilt the Dupont wire pins to ensure proper connection.

5. Starting the Flashing Process
After importing the algorithms and firmware, the device will display available options upon startup. Select the algorithm and firmware matching your target device. Click Idle, then Busy to begin flashing. (Note: Some chips, like STM32F0xx series, may require pressing Busy twice.)


6. Using with Module Bus
For daily DAPLink debugging, the Module Bus is highly recommended for easier wiring. It extends the MBus interface to the board's edge and includes two sets of 2.54-15P 90° headers for seamless Dupont wire connections.


Why M5 DAPLink is a Game-Changer
• No extra hardware needed – Your M5 device becomes a portable STM32 programmer.
• Works offline – No need for a PC once set up.
• Flexible import methods – USB, SD card, or web upload.
• Perfect for fieldwork and education – Quick firmware updates anywhere.
With M5 DAPLink, you turn ideas into reality faster—no hassle, no complicated setups. Ready to give it a try? Download the firmware today and start flashing like a pro!

In this article, we will integrate the M5Stack Air Quality Kit with Home Assistant to monitor air quality.
Index
While air quality may not be a concern for everyone, those of us living in large cities or near industrial areas are increasingly worried about the air we breathe at home. This concern is not unfounded—numerous studies have shown that long-term exposure to pollutants can lead to respiratory diseases such as asthma and bronchitis. Over time, it can also shorten lifespan and increase the risk of chronic illnesses like lung cancer.
From this perspective, home automation can help mitigate these effects by monitoring air quality, sending alerts when pollution levels rise, or even activating ventilation or air purification systems. If you're concerned about overall environmental pollution, you can refer to indexes like the World Air Quality Index.
However, whether you distrust external data (for instance, if monitoring stations are conveniently placed in green zones) or simply want to measure the specific data in your own home, an air quality sensor is essential. When it comes to finding a sensor that is comprehensive, integrable, and reasonably priced, debates always arise.
M5Stack is a well-known brand that offers devices like the M5Stack CoreS3SE and the historically significant Atom Echo. In this case, we’ll integrate the M5Stack Air Quality Kit with Home Assistant. This device is based on the ESP32S3FN8 chip and can measure CO2, VOCs, PM1.0, PM2.5, PM4, and PM10 particles, along with temperature and humidity (though some reviews suggest the accuracy of the latter two may be questionable). It also features an e-ink display and a built-in battery.

By the way, while this article focuses on integrating the M5Stack Air Quality Kit with Home Assistant, you can also use it directly with your mobile device to monitor its readings. The video below explains the setup process.
To integrate the M5Stack Air Quality Kit into Home Assistant, you will need:
🥑 If you’re new to ESPHome, I recommend checking out the Academy workshop to get the most of it!
Follow these steps to integrate the M5Stack Air Quality Kit into Home Assistant:
1. In Home Assistant, go to your ESPHome plugin, click “New Device,” and then click “Continue.”
2. Name your device (e.g., “ Air Quality Kit”) and click “Next.”
3. Select “ESP32-S3” as the device type. You'll notice that a new block has been created for your device in the background.
4. Click “Skip” and click “Edit” on the device block above. Copy the code that appears and save it, as you will need some parts of it later.
5. Copy the following code (which I found on reddit and edited slightly) and replace the above code in ESPHome.
substitutions:
  devicename: lounge-airq
  friendlyname: Lounge AirQ
  location: Lounge
  sensor_interval: 10s

esphome:
  name: ${devicename}
  friendly_name: ${friendlyname}
  area: ${location}
  platformio_options:
    board_build.mcu: esp32s3
    board_build.name: "M5Stack StampS3"
    board_build.upload.flash_size: 8MB
    board_build.upload.maximum_size: 8388608
    board_build.vendor: M5Stack
  on_boot:
  - priority: 800
    then:
      - output.turn_on: enable
  - priority: 800
    then:
      - pcf8563.read_time

esp32:
  board: esp32-s3-devkitc-1 #m5stack-stamps3
  variant: esp32s3
  framework:
    type: arduino

# Enable logging
logger:

# Enable Home Assistant API
api:
  encryption:
    key: REDACTED

ota:
  - platform: esphome
    password: REDACTED

wifi:
  ssid: !secret wifi_ssid
  password: !secret wifi_password

  # Enable fallback hotspot (captive portal) in case wifi connection fails
  ap:
    ssid: "Lounge-Airq Fallback Hotspot"
    password: REDACTED

captive_portal:

output:
  - platform: gpio
    pin: GPIO10
    id: enable

web_server:
   port: 80
   include_internal: true

i2c:
  sda: GPIO11
  scl: GPIO12
  scan: true
  frequency: 100kHz
  id: bus_a

spi:
  clk_pin: GPIO05
  mosi_pin: GPIO06

time:
  - platform: pcf8563
    address: 0x51
    update_interval: 10min
  - platform: homeassistant
    id: esptime

light:
  - platform: esp32_rmt_led_strip
    rgb_order: GRB
    pin: GPIO21
    num_leds: 1
    rmt_channel: 0
    chipset: SK6812
    name: "LED"
    restore_mode: ALWAYS_OFF
    id: id_led

text_sensor:
  - platform: wifi_info
    ip_address:
      name: IP
    ssid:
      name: SSID
    bssid:
      name: BSSID
    mac_address:
      name: MAC
    dns_address:
      name: DNS

  - platform: template
    name: "VOC IAQ Classification"
    id: iaq_voc
    icon: "mdi:checkbox-marked-circle-outline"
    lambda: |-
      if (int(id(voc).state) < 100.0) {
        return {"Great"};
      }
      else if (int(id(voc).state) <= 200.0) {
        return {"Good"};
      }
      else if (int(id(voc).state) <= 300.0) {
        return {"Light"};
      }
      else if (int(id(voc).state) <= 400.0) {
        return {"Moderate"};
      }
      else if (int(id(voc).state) <= 500.0) {
        return {"Heavy"};
      }
      else {
        return {"unknown"};
      }

  - platform: template
    name: "NOX IAQ Classification"
    id: iaq_nox
    icon: "mdi:checkbox-marked-circle-outline"
    lambda: |-
      if (int(id(nox).state) < 100.0) {
        return {"Great"};
      }
      else if (int(id(nox).state) <= 200.0) {
        return {"Good"};
      }
      else if (int(id(nox).state) <= 300.0) {
        return {"Light"};
      }
      else if (int(id(nox).state) <= 400.0) {
        return {"Moderate"};
      }
      else if (int(id(nox).state) <= 500.0) {
        return {"Heavy"};
      }
      else {
        return {"unknown"};
      }

sensor:
  - platform: scd4x
    co2:
      name: CO2
      id: CO2
      filters:
        - lambda: |-
            float MIN_VALUE = 300.0;
            float MAX_VALUE = 2500.0;
            if (MIN_VALUE <= x && x <= MAX_VALUE) return x;
            else return {};
    temperature:
      name: CO2 Temperature
      id: CO2_temperature
      filters:
        - lambda: |-
            float MIN_VALUE = -40.0;
            float MAX_VALUE = 100.0;
            if (MIN_VALUE <= x && x <= MAX_VALUE) return x;
            else return {};
    humidity:
      name: CO2 Humidity
      id: CO2_humidity
      filters:
        - lambda: |-
            float MIN_VALUE = 0.0;
            float MAX_VALUE = 100.0;
            if (MIN_VALUE <= x && x <= MAX_VALUE) return x;
            else return {};
    altitude_compensation: 0m
    address: 0x62
    update_interval: $sensor_interval

  - platform: wifi_signal # Reports the WiFi signal strength/RSSI in dB
    name: "Wifi Signal dB"
    id: wifi_signal_db
    update_interval: 60s
    entity_category: "diagnostic"

  - platform: sen5x
    id: sen55
    pm_1_0:
      name: "PM 1"
      id: PM1_0
      accuracy_decimals: 2
    pm_2_5:
      name: "PM 2.5"
      id: PM2_5
      accuracy_decimals: 2
    pm_4_0:
      name: "PM 4"
      id: PM4_0
      accuracy_decimals: 2
    pm_10_0:
      name: "PM 10"
      id: PM10_0
      accuracy_decimals: 2
    temperature:
      name: "SEN55 Temperature"
      id: sen55_temperature
      accuracy_decimals: 2
    humidity:
      name: "SEN55 Humidity"
      id: sen55_humidity
      accuracy_decimals: 2
    voc:
      name: VOC
      id: voc
      accuracy_decimals: 2
      algorithm_tuning:
        index_offset: 100
        learning_time_offset_hours: 12
        learning_time_gain_hours: 12
        gating_max_duration_minutes: 180
        std_initial: 50
        gain_factor: 230
    nox:
      name: NOX
      id: nox
      accuracy_decimals: 2
      algorithm_tuning:
        index_offset: 100
        learning_time_offset_hours: 12
        learning_time_gain_hours: 12
        gating_max_duration_minutes: 180
        std_initial: 50
        gain_factor: 230
    temperature_compensation:
      offset: 0
      normalized_offset_slope: 0
      time_constant: 0
    acceleration_mode: low
    store_baseline: true
    address: 0x69
    update_interval: $sensor_interval

  - platform: template
    name: Temperature
    id: temperature
    lambda: |-
      return (( id(sen55_temperature).state + id(CO2_temperature).state ) / 2 ) - id(temperature_offset).state;
    unit_of_measurement: "°C"
    icon: "mdi:thermometer"
    device_class: "temperature"
    state_class: "measurement"
    update_interval: $sensor_interval
    accuracy_decimals: 2

  - platform: template
    name: Humidity
    id: humidity
    lambda: |-
      return (( id(sen55_humidity).state + id(CO2_humidity).state ) / 2) - id(humidity_offset).state;
    unit_of_measurement: "%"
    icon: "mdi:water-percent"
    device_class: "humidity"
    state_class: "measurement"
    update_interval: $sensor_interval
    accuracy_decimals: 2

binary_sensor:
  - platform: gpio
    name: Button A
    pin:
      number: GPIO0
      ignore_strapping_warning: true
      mode:
        input: true
      inverted: true
    on_press:
      then:
        - component.update: disp

  - platform: gpio
    pin:
      number: GPIO08
      mode:
        input: true
        pullup: true
      inverted: true
    name: Button B

  - platform: gpio
    pin:
      number: GPIO46
      ignore_strapping_warning: true
    name: Button Hold

  - platform: gpio
    pin:
      number: GPIO42
    name: Button Power

button:
  - platform: restart
    name: Restart

  - platform: template
    name: "CO2 Force Manual Calibration"
    entity_category: "config"
    on_press:
      then:
        - scd4x.perform_forced_calibration:
            value: !lambda 'return id(co2_cal).state;'

  - platform: template
    name: "SEN55 Force Manual Clean"
    entity_category: "config"
    on_press:
      then:
        - sen5x.start_fan_autoclean: sen55

number:
  - platform: template
    name: "CO2 Calibration Value"
    optimistic: true
    min_value: 400
    max_value: 1000
    step: 5
    id: co2_cal
    icon: "mdi:molecule-co2"
    entity_category: "config"

  - platform: template
    name: Humidity Offset
    id: humidity_offset
    restore_value: true
    initial_value: 0.0
    min_value: -70.0
    max_value: 70.0
    entity_category: "CONFIG"
    unit_of_measurement: "%"
    optimistic: true
    update_interval: never
    step: 0.1
    mode: box

  - platform: template
    name: Temperature Offset
    id: temperature_offset
    restore_value: true
    initial_value: 0.0
    min_value: -70.0
    max_value: 70.0
    entity_category: "CONFIG"
    unit_of_measurement: "°C"
    optimistic: true
    update_interval: never
    step: 0.1
    mode: box

display:
  - platform: waveshare_epaper
    model: 1.54inv2
    id: disp
    cs_pin: GPIO04
    dc_pin: GPIO03
    reset_pin: GPIO02
    busy_pin:
      number: GPIO01
      inverted: false
    full_update_every: 6
    reset_duration: 2ms
    update_interval: 10s
    lambda: |-
      auto now = id(esptime).now().strftime("%H:%M %d/%m/%y").c_str();
      it.printf(it.get_width()/2, 0, id(f12), TextAlign::TOP_CENTER, "${location} @ %s", now);

      it.print(0, 23, id(f24), TextAlign::TOP_LEFT, "PM 1: ");
      it.print(0, 48, id(f24), TextAlign::TOP_LEFT, "PM 2.5: ");
      it.print(0, 73, id(f24), TextAlign::TOP_LEFT, "PM 4: ");
      it.print(0, 98, id(f24), TextAlign::TOP_LEFT, "PM 10: ");
      it.print(0, 123, id(f24), TextAlign::TOP_LEFT, "CO2: ");
      it.print(0, 148, id(f24), TextAlign::TOP_LEFT, "VOC: ");
      it.print(0, 173, id(f24), TextAlign::TOP_LEFT, "NOX: ");

      it.printf(it.get_width(), 23, id(f24), TextAlign::TOP_RIGHT, "%.0f", id(PM1_0).state);
      it.printf(it.get_width(), 48, id(f24), TextAlign::TOP_RIGHT, "%.0f", id(PM2_5).state);
      it.printf(it.get_width(), 73, id(f24), TextAlign::TOP_RIGHT, "%.0f", id(PM4_0).state);
      it.printf(it.get_width(), 98, id(f24), TextAlign::TOP_RIGHT, "%.0f", id(PM10_0).state);
      it.printf(it.get_width(), 123, id(f24), TextAlign::TOP_RIGHT, "%.0fppm", id(CO2).state);
      it.printf(it.get_width(), 148, id(f24), TextAlign::TOP_RIGHT, "%.0f", id(voc).state);
      it.printf(it.get_width(), 173, id(f24), TextAlign::TOP_RIGHT, "%.0f", id(nox).state);

font:
  - file:
      type: gfonts
      family: Noto Sans Display
      weight: 500
    glyphs: ['&', '@', '!', ',', '.', '"', '%', '(', ')', '+', '-', '_', ':', '°', '0',
        '1', '2', '3', '4', '5', '6', '7', '8', '9', 'A', 'B', 'C', 'D', 'E',
        'F', 'G', 'H', 'I', 'J', 'K', 'L', 'M', 'N', 'O', 'P', 'Q', 'R', 'S',
        'T', 'U', 'V', 'W', 'X', 'Y', 'Z', ' ', 'a', 'b', 'c', 'd', 'e', 'f',
        'g', 'h', 'i', 'j', 'k', 'l', 'm', 'n', 'o', 'p', 'q', 'r', 's', 't',
        'u', 'v', 'w', 'x', 'y', 'z','å', 'ä', 'ö', '/', 'µ', '³', '’']
    id: f16
    size: 16
  - file:
      type: gfonts
      family: Noto Sans Display
      weight: 500
    glyphs: ['&', '@', '!', ',', '.', '"', '%', '(', ')', '+', '-', '_', ':', '°', '0',
        '1', '2', '3', '4', '5', '6', '7', '8', '9', 'A', 'B', 'C', 'D', 'E',
        'F', 'G', 'H', 'I', 'J', 'K', 'L', 'M', 'N', 'O', 'P', 'Q', 'R', 'S',
        'T', 'U', 'V', 'W', 'X', 'Y', 'Z', ' ', 'a', 'b', 'c', 'd', 'e', 'f',
        'g', 'h', 'i', 'j', 'k', 'l', 'm', 'n', 'o', 'p', 'q', 'r', 's', 't',
        'u', 'v', 'w', 'x', 'y', 'z','å', 'ä', 'ö', '/', 'µ', '³', '’']
    id: f18
    size: 18
  - file:
      type: gfonts
      family: Noto Sans Display
      weight: 500
    id: f12
    size: 12
    glyphs: ['&', '@', '!', ',', '.', '"', '%', '(', ')', '+', '-', '_', ':', '°', '0',
        '1', '2', '3', '4', '5', '6', '7', '8', '9', 'A', 'B', 'C', 'D', 'E',
        'F', 'G', 'H', 'I', 'J', 'K', 'L', 'M', 'N', 'O', 'P', 'Q', 'R', 'S',
        'T', 'U', 'V', 'W', 'X', 'Y', 'Z', ' ', 'a', 'b', 'c', 'd', 'e', 'f',
        'g', 'h', 'i', 'j', 'k', 'l', 'm', 'n', 'o', 'p', 'q', 'r', 's', 't',
        'u', 'v', 'w', 'x', 'y', 'z','å', 'ä', 'ö', '/', 'µ', '³', '’']
  - file:
      type: gfonts
      family: Noto Sans Display
      weight: 500
    id: f24
    size: 24
    glyphs: ['&', '@', '!', ',', '.', '"', '%', '(', ')', '+', '-', '_', ':', '°', '0',
        '1', '2', '3', '4', '5', '6', '7', '8', '9', 'A', 'B', 'C', 'D', 'E',
        'F', 'G', 'H', 'I', 'J', 'K', 'L', 'M', 'N', 'O', 'P', 'Q', 'R', 'S',
        'T', 'U', 'V', 'W', 'X', 'Y', 'Z', ' ', 'a', 'b', 'c', 'd', 'e', 'f',
        'g', 'h', 'i', 'j', 'k', 'l', 'm', 'n', 'o', 'p', 'q', 'r', 's', 't',
        'u', 'v', 'w', 'x', 'y', 'z','å', 'ä', 'ö', '/', 'µ', '³', '’']
  - file:
      type: gfonts
      family: Noto Sans Display
      weight: 500
    id: f36
    size: 36
    glyphs: ['&', '@', '!', ',', '.', '"', '%', '(', ')', '+', '-', '_', ':', '°', '0',
        '1', '2', '3', '4', '5', '6', '7', '8', '9', 'A', 'B', 'C', 'D', 'E',
        'F', 'G', 'H', 'I', 'J', 'K', 'L', 'M', 'N', 'O', 'P', 'Q', 'R', 'S',
        'T', 'U', 'V', 'W', 'X', 'Y', 'Z', ' ', 'a', 'b', 'c', 'd', 'e', 'f',
        'g', 'h', 'i', 'j', 'k', 'l', 'm', 'n', 'o', 'p', 'q', 'r', 's', 't',
        'u', 'v', 'w', 'x', 'y', 'z','å', 'ä', 'ö', '/', 'µ', '³', '’']
  - file:
      type: gfonts
      family: Noto Sans Display
      weight: 500
    id: f48
    size: 48
    glyphs: ['&', '@', '!', ',', '.', '"', '%', '(', ')', '+', '-', '_', ':', '°', '0',
        '1', '2', '3', '4', '5', '6', '7', '8', '9', 'A', 'B', 'C', 'D', 'E',
        'F', 'G', 'H', 'I', 'J', 'K', 'L', 'M', 'N', 'O', 'P', 'Q', 'R', 'S',
        'T', 'U', 'V', 'W', 'X', 'Y', 'Z', ' ', 'a', 'b', 'c', 'd', 'e', 'f',
        'g', 'h', 'i', 'j', 'k', 'l', 'm', 'n', 'o', 'p', 'q', 'r', 's', 't',
        'u', 'v', 'w', 'x', 'y', 'z','å', 'ä', 'ö', '/', 'µ', '³', '’']
  - file:
      type: gfonts
      family: Noto Sans Display
      weight: 500
    id: f32
    size: 32
    glyphs: ['&', '@', '!', ',', '.', '"', '%', '(', ')', '+', '-', '_', ':', '°', '0',
        '1', '2', '3', '4', '5', '6', '7', '8', '9', 'A', 'B', 'C', 'D', 'E',
        'F', 'G', 'H', 'I', 'J', 'K', 'L', 'M', 'N', 'O', 'P', 'Q', 'R', 'S',
        'T', 'U', 'V', 'W', 'X', 'Y', 'Z', ' ', 'a', 'b', 'c', 'd', 'e', 'f',
        'g', 'h', 'i', 'j', 'k', 'l', 'm', 'n', 'o', 'p', 'q', 'r', 's', 't',
        'u', 'v', 'w', 'x', 'y', 'z','å', 'ä', 'ö', '/', 'µ', '³', '’']

  - file:
      type: gfonts
      family: Noto Sans Display
      weight: 500
    id: f64
    size: 64
    glyphs: ['&', '@', '!', ',', '.', '"', '%', '(', ')', '+', '-', '_', ':', '°', '0',
        '1', '2', '3', '4', '5', '6', '7', '8', '9', 'A', 'B', 'C', 'D', 'E',
        'F', 'G', 'H', 'I', 'J', 'K', 'L', 'M', 'N', 'O', 'P', 'Q', 'R', 'S',
        'T', 'U', 'V', 'W', 'X', 'Y', 'Z', ' ', 'a', 'b', 'c', 'd', 'e', 'f',
        'g', 'h', 'i', 'j', 'k', 'l', 'm', 'n', 'o', 'p', 'q', 'r', 's', 't',
        'u', 'v', 'w', 'x', 'y', 'z','å', 'ä', 'ö', '/', 'µ', '³', '’']

  - file:
      type: gfonts
      family: Noto Sans Display
      weight: 800
    id: f64b
    size: 64
    glyphs: ['&', '@', '!', ',', '.', '"', '%', '(', ')', '+', '-', '_', ':', '°', '0',
        '1', '2', '3', '4', '5', '6', '7', '8', '9', 'A', 'B', 'C', 'D', 'E',
        'F', 'G', 'H', 'I', 'J', 'K', 'L', 'M', 'N', 'O', 'P', 'Q', 'R', 'S',
        'T', 'U', 'V', 'W', 'X', 'Y', 'Z', ' ', 'a', 'b', 'c', 'd', 'e', 'f',
        'g', 'h', 'i', 'j', 'k', 'l', 'm', 'n', 'o', 'p', 'q', 'r', 's', 't',
        'u', 'v', 'w', 'x', 'y', 'z','å', 'ä', 'ö', '/', 'µ', '³', '’']

  - file:
      type: gfonts
      family: Noto Sans Display
      weight: 800
    id: f55b
    size: 55
    glyphs: ['&', '@', '!', ',', '.', '"', '%', '(', ')', '+', '-', '_', ':', '°', '0',
        '1', '2', '3', '4', '5', '6', '7', '8', '9', 'A', 'B', 'C', 'D', 'E',
        'F', 'G', 'H', 'I', 'J', 'K', 'L', 'M', 'N', 'O', 'P', 'Q', 'R', 'S',
        'T', 'U', 'V', 'W', 'X', 'Y', 'Z', ' ', 'a', 'b', 'c', 'd', 'e', 'f',
        'g', 'h', 'i', 'j', 'k', 'l', 'm', 'n', 'o', 'p', 'q', 'r', 's', 't',
        'u', 'v', 'w', 'x', 'y', 'z','å', 'ä', 'ö', '/', 'µ', '³', '’']

  - file:
      type: gfonts
      family: Material Symbols Sharp
      weight: 400
    id: font_weather_icons_xsmall
    size: 20
    glyphs:
      - "\U0000F159" # clear-night
      - "\U0000F15B" # cloudy
      - "\U0000F172" # partlycloudy
      - "\U0000E818" # fog
      - "\U0000F67F" # hail
      - "\U0000EBDB" # lightning, lightning-rainy
      - "\U0000F61F" # pouring
      - "\U0000F61E" # rainy
      - "\U0000F61C" # snowy
      - "\U0000F61D" # snowy-rainy
      - "\U0000E81A" # sunny
      - "\U0000EFD8" # windy, windy-variant
      - "\U0000F7F3" # exceptional
  - file:
      type: gfonts
      family: Material Symbols Sharp
      weight: 400
    id: font_weather_icons_small
    size: 32
    glyphs:
      - "\U0000F159" # clear-night
      - "\U0000F15B" # cloudy
      - "\U0000F172" # partlycloudy
      - "\U0000E818" # fog
      - "\U0000F67F" # hail
      - "\U0000EBDB" # lightning, lightning-rainy
      - "\U0000F61F" # pouring
      - "\U0000F61E" # rainy
      - "\U0000F61C" # snowy
      - "\U0000F61D" # snowy-rainy
      - "\U0000E81A" # sunny
      - "\U0000EFD8" # windy, windy-variant
      - "\U0000F7F3" # exceptional

  - file:
      type: gfonts
      family: Open Sans
      weight: 700
    id: font_clock
    glyphs: "0123456789:"
    size: 70
  - file:
      type: gfonts
      family: Open Sans
      weight: 700
    id: font_clock_big
    glyphs: "0123456789:"
    size: 100
  - file: "gfonts://Roboto"
    id: font_temp
    size: 28
  - file:
      type: gfonts
      family: Open Sans
      weight: 500
    id: font_small
    size: 30
    glyphs: "!\"%()+=,-_.:°0123456789ABCDEFGHIJKLMNOPQRSTUVWXYZ abcdefghijklmnopqrstuvwxyz→»"
  - file:
      type: gfonts
      family: Open Sans
      weight: 500
    id: font_medium
    size: 45
    glyphs: "!\"%()+=,-_.:°0123456789ABCDEFGHIJKLMNOPQRSTUVWXYZ abcdefghijklmnopqrstuvwxyz→»"
  - file:
      type: gfonts
      family: Open Sans
      weight: 300
    id: font_xsmall
    size: 16
    glyphs: "!\"%()+=,-_.:°0123456789ABCDEFGHIJKLMNOPQRSTUVWXYZ abcdefghijklmnopqrstuvwxyz→»"
6. Important: This code does not include the credentials for connecting the device to your Wi-Fi and Home Assistant instance, so you will need to enter them manually. Specifically, I am referring to the following lines of code that you copied in step 4.
# Enable Home Assistant API
api:
  encryption:
    key: "bg6hash6sjdjsdjk02hh0qnQeYVwm123vdfKE8BP5"

ota:
  - platform: esphome
    password: "asddasda27aab65a48484502b332f"

wifi:
  ssid: !secret wifi_ssid
  password: !secret wifi_password

  # Enable fallback hotspot (captive portal) in case wifi connection fails
  ap:
    ssid: "Assist Fallback Hotspot"
    password: "ZsasdasdHGP2234"
7. What you need to do is find the corresponding lines in the code (at the beginning) and add the necessary information.
8. Now, click “Save” and “Install.” Select “Manual download” and wait for the code to compile.
9. When finished, select the “Modern format” option to download the corresponding “.bin” file.
10. Connect the M5Stack Air Quality Kit to your computer using the USB-C data cable via the port on the bottom.
11. Now go to the ESPHome page and click "Connect." In the pop-up window, select your board and click "Connect."
12. Now click on “Install” and select the '.bin' file obtained in step 9. Again, click on “Install”.
13. Go back to Home Assistant and navigate to Settings > Devices & Services. Your device should be discovered and appear at the top, ready for you to click the “Configure” button. If not, click the “Add Integration” button, search for "ESPHome," and enter your board’s IP address in the "Host" field.
If you navigate to Settings > Devices & Services > ESPHome and select the M5Stack Air Quality Kit, you'll find several entities providing information about air quality.

Additionally, the buttons on the device's top-left corner have also been exposed as entities. This means you can create an automation to trigger an action when you press them, such as activating your ventilation system.
To set this up, go to Settings > Automations and Scenes > Create Automation. In the "When" section, add a "State" trigger. In the entity field, select the one corresponding to your device (e.g., 'binary_sensor.airq_button_a'), and in the "To" field, choose "On." Then, simply add the desired actions.
Source: AguacaTEC
Author: TitoTB

On November 18, 2024, M5Stack opened its doors to individual visitors for the first time. More than 70 visitors from all around the world attended the event, with some showcasing their projects built with M5 products or sharing their stories with M5Stack.

The event began at 3:00 PM, with many visitors checking in and receiving their gifts—custom T-shirts featuring the M5Stack logo. After a group photo, the first agenda kicked off: The Factory and Office Tour.
The visitors were divided into three groups, with introductions provided in Chinese, English, and Japanese. M5Stack operates an all-in-one facility where product design, production, packaging, quality control, marketing, and shipping are seamlessly managed under one place. Visitors could take a close look at the whole flow.

In the show board area, we display all the products we've created so far, including the classic 5x5 stack series—such as M5Basic Core, M5Core2, M5Core3, and Stick series—like the M5StickC, along with the Stamp Series (M5Cardputer, M5StampFly), and the Atom series (M5Atom Echo), among others. M5Stack’s CEO, Jimmy Lai, also explains "What is M5Stack?"

M5Stack is an open-source hardware IoT solution provider, primarily focused on products built around the ESP32. We also offer a range of accessories and our own visual programming platform, UIFlow. The "M" in M5Stack stands for Module, "5" represents the 5x5 cm size, and "Stack" refers to their stackable design.
M5Stack is committed to delivering convenient, stackable and easy-to-use development components and tools, with at least one new product every Friday, we launch over 50 new products every year. We provide not only standard products, also customized products. Our partner includes Amazon, Microsoft, Arduino, SONY, etc.
After the tour, it’s time for the Meetup. This year, we have 9 speakers. Jimmy began by sharing the company’s history, followed by presentations from the speakers. TAKASU Masakazu shared the success stories of M5Stack in Japan, where the Japanese market accounts for 35% of M5Stack’s global sales. Many companies and schools in Japan use M5Stack products, and you can even find books on how to use M5Stack products on Amazon.

Other speakers introduced their innovative projects, including the Creative Dot Matrix Clock, the M5Unified Library, M5Cuffbox, and the Blue Tears Incubator, how to make stack-chan bigger, etc.

It was a truly enjoyable experience to come together with M5Stack fans from all over. We appreciate everyone’s enthusiasm and participation, and we’re already looking forward to welcoming you again next year. See you then!


気分転換と運動を兼ねて、1ヶ月前に自転車を買って夕方に走っているのですが、今日は超音波風速計を載せてみました。
— STRATOVISION🎈気球の開発 (@strvsn) August 12, 2023
向かい風や追い風や横風で思っていたよりスピードに影響が出ます。
色々センシングすれば漕ぐパワーとかも測れますかね?🚴♂️ pic.twitter.com/WolbxzlhYh

#M5Stack 距離を測るUnitを Arduinoで比較してみる。
— タカオ(Takao) (@mongonta555) July 28, 2022
ULTRASONIC I2C pic.twitter.com/6iYs7nWo7H

富士山でM5stickCとEnvIII Unitで気圧を測定中。現在9合目659hPa #富士山 #M5Stack pic.twitter.com/4Y0W45PkT0
— みきひろし (@miki_hiroshi_77) July 23, 2022

#M5Stack #ATOMS3
— 山口辰久 (@qzy13700) May 7, 2023
「エアリアル・スタックチャン」or「エールスタックチャン」。
見た目から期待した通りATOM Matrixと同じ形状なのでそのまま載せられました。
但し、6軸慣性センサー(MPU6886)を高速で読み出したり測定域を変えたりするために、ATOM_S3ライブラリに若干の修正が必要でした。 pic.twitter.com/cxEPzmVa6b

ATOMS3 Man
— 老電 (@elec_leak) March 31, 2023
PIR検出してない時 たまにウィンク
ATOM EchoとBusCに検出通知
🔊 ATOM Echo + 4Ω3W AquesTalk#M5Stack #ATOMS3 #PIR #レゴ pic.twitter.com/PkY3jchSHH

ハンド追跡アプリで、8種類のジェスチャー検出を試してみる。
— mktechlab_net (@mktechlab_net) May 7, 2023
ジェスチャー名を M5Stack Basic に表示する処理を追加。35FPSくらい出るのでレスポンスも良い感じ。#akarirobot #OAKD #M5Stack #HandTracking pic.twitter.com/sTTKsL6GLJ

M5Stack社の新商品Atom Uが届いたので早速システムに組み込んだ。
— 五味 (@GomiHgy) January 8, 2022
外部入出力がGrove+シリアル通信くらいでいいからUSB給電でWifiで通信させて動かしたいときにコンパクトに作れていいね。https://t.co/s1WfhV1p72 pic.twitter.com/X1G7tQVd2K


1. ATOM Matrix x1
2. M5StickC Plus x1
3. RS485 HAT x1
4. Tail485 x1
5.120 Ohm plug-in resistor x1
6. RS485 cable x1
7. 12V power supply x1